A tube of roofing cement is not a repair. It is a countdown to structural rot. You see the water stains on your ceiling. You worry about the hidden damage in your attic. These fears are valid. Fixing chimney flashing is a matter of precision engineering, not just slapping on sealant. Most homeowners are rightfully confused by the complex, overlapping layers of metal. It is a mechanical system designed to shed water. When it fails, your home is at risk.
You need a leak-free connection that lasts. We provide the technical expertise to help you master this process. This guide breaks down the mechanics of diagnosing, repairing, and replacing failed flashing components. We will explain how to identify structural threats before they become costly disasters. You will learn the exact steps to restore your roof's integrity and know precisely when to call a CSIA-certified expert. Let's secure your home against the elements.
Key Takeaways
- Identify the three-layer defense system of base, step, and counter-flashing essential for a watertight seal.
- Distinguish between minor surface rust and critical structural holes to determine if you need a repair or a full replacement.
- Follow a precise, professional process for fixing chimney flashing to ensure your roof deck remains free from wood rot.
- Select durable materials capable of withstanding the intense freeze-thaw cycles common in New Jersey and Philadelphia climates.
- Recognize the dangers of hidden leaks and when to prioritize a professional safety investment over a DIY fix.
What is Chimney Flashing and Why Does it Fail?
Chimney flashing is a mechanical water-diversion system that relies on gravity and layering. It acts as the primary barrier between your vertical masonry and your horizontal roof deck. Without this multi-layered metal system, water would flow directly into the gap where these two structures meet. Most homeowners view it as a simple trim piece. It is actually a complex engineering solution. What is Chimney Flashing? It is a series of overlapping metal sheets designed to guide rain away from the chimney base. It is the most vulnerable point on your roof.
The Anatomy of a Waterproof Chimney Seal
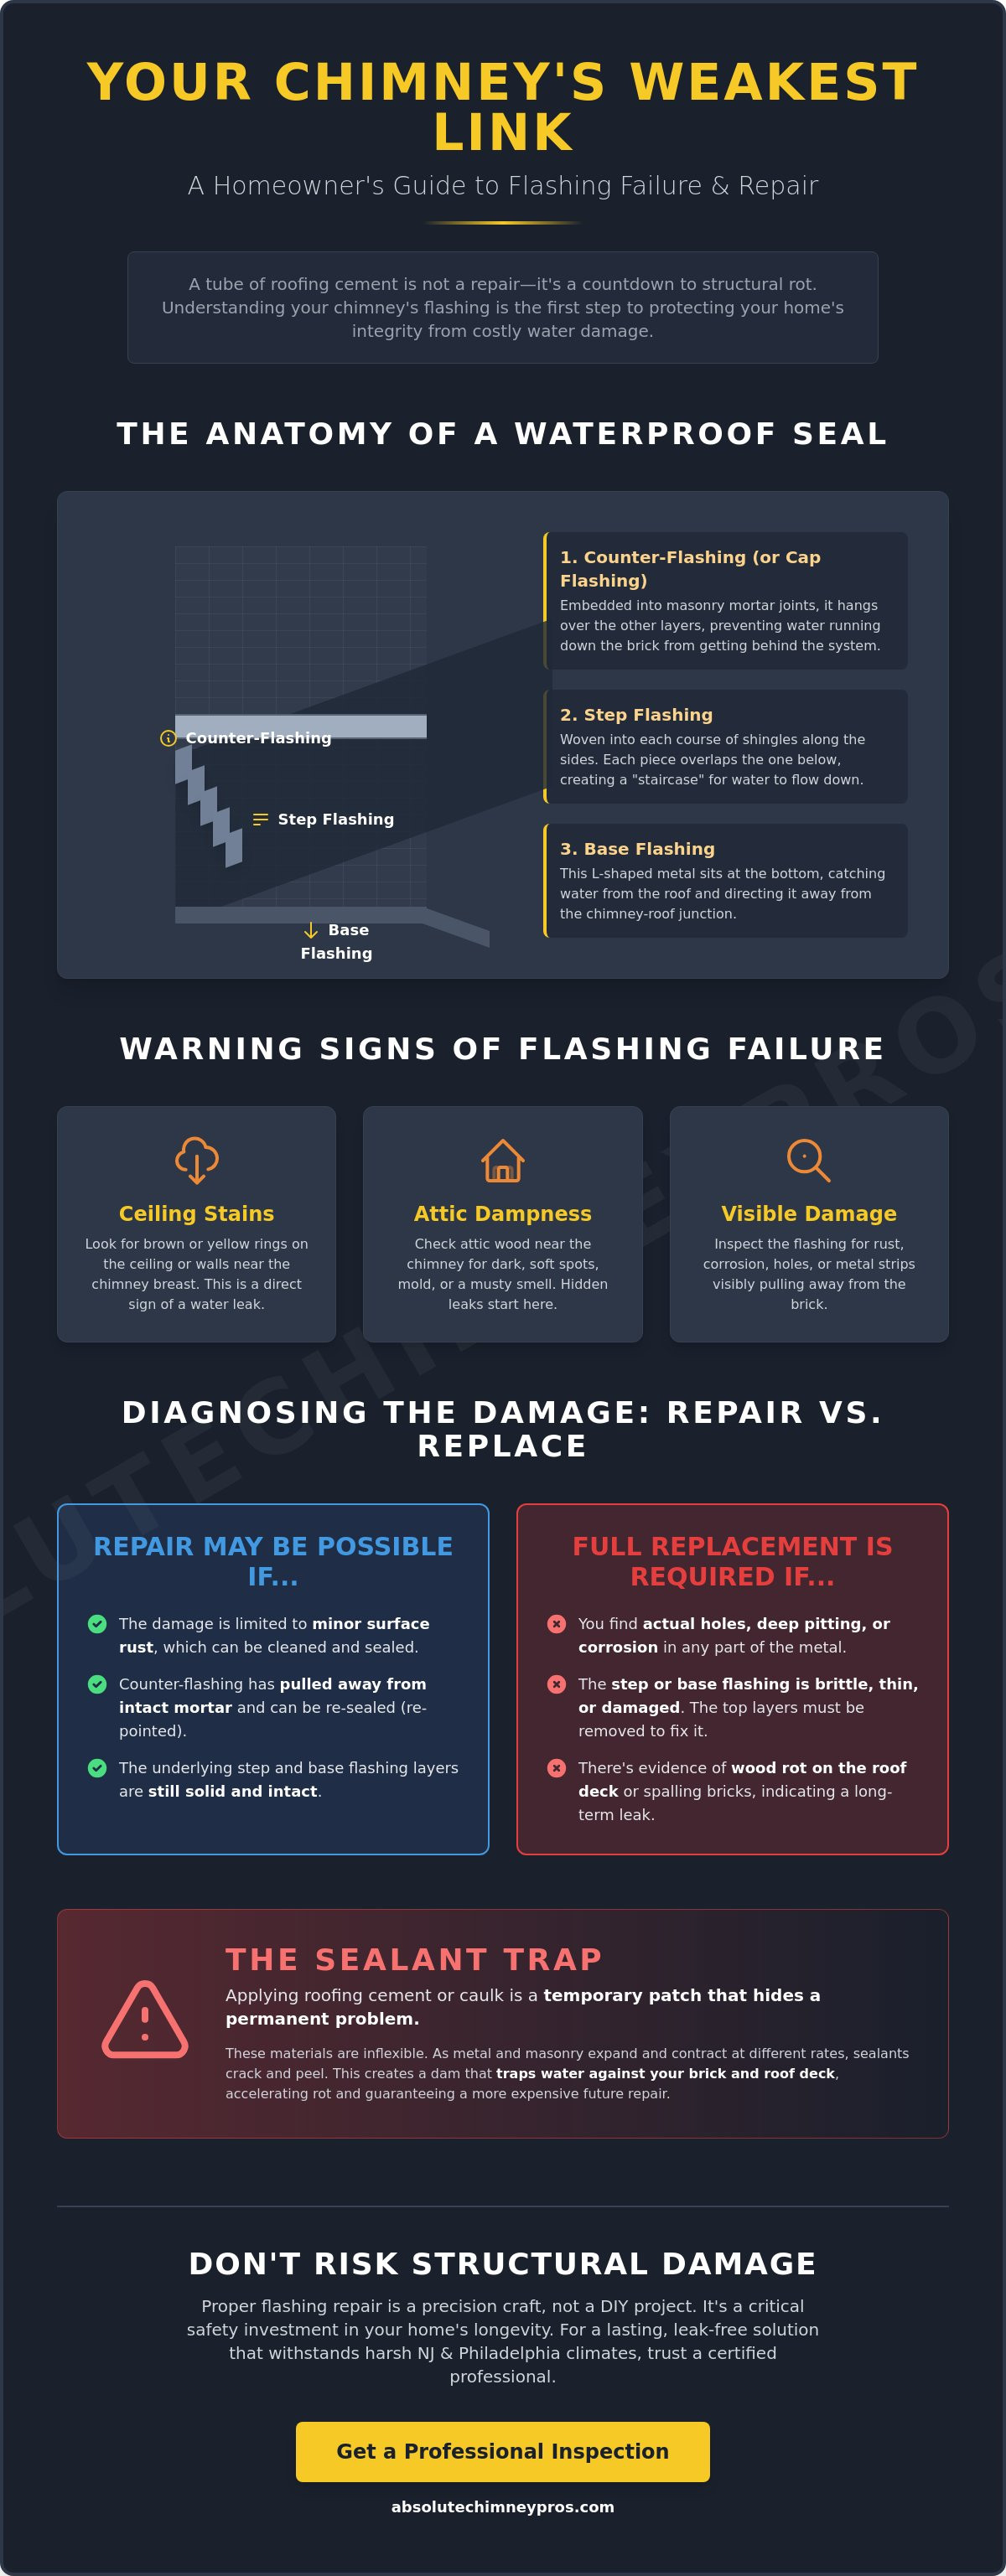
A functional seal requires three distinct layers working in unison. Each component serves a specific role in shedding water.
- Base flashing: This L-shaped metal sits at the bottom of the chimney. It catches water running down the roof and directs it away from the junction.
- Step flashing: These pieces are woven into each course of shingles along the side walls of the chimney. Each piece overlaps the one below it. This creates a staircase effect that sheds water downward.
- Counter-flashing: Also called cap flashing, this layer is embedded directly into the masonry mortar joints. It hangs over the top of the step and base flashing. This ensures water running down the brick cannot get behind the lower layers.
Fixing chimney flashing is a technical necessity when these layers lose their physical bond. Metal and masonry expand and contract at different rates. This thermal expansion eventually breaks the mortar seal. Rust is another enemy. Galvanized steel eventually corrodes, creating pinholes that allow water to seep through. Improper initial installation is the most common culprit. If the layers aren't woven correctly, gravity works against you. Water finds the path of least resistance. Usually, that path leads into your rafters. Understanding the mechanics of fixing chimney flashing is the first step toward a permanent repair.
Common Symptoms of Flashing Failure in NJ Homes
Do not ignore the warning signs. Local weather patterns, including heavy rain and freeze-thaw cycles, accelerate damage. Vigilance is your best defense against structural rot.
- Water stains appearing on the ceiling near the chimney breast. These often look like brown or yellow rings.
- Dampness or mold growth inside the attic space. Check the wood directly below the roofline for dark, soft spots.
- Visible rust or metal strips "lifting" away from the masonry surface. If you can see a gap between the metal and the mortar, the seal is gone.
This failure does more than damage drywall. It compromises the masonry and can eventually lead to chimney liner deterioration. Identifying these symptoms early prevents expensive structural repairs.
Diagnosing the Damage: Repair vs. Full Replacement
Fixing chimney flashing requires a disciplined eye. You must distinguish between cosmetic wear and structural failure. Surface rust is a warning. It can often be cleaned, primed, and painted to extend its life. Actual holes or pitting are non-negotiable. They demand immediate replacement. If the counter-flashing has simply pulled away from the brick, a targeted re-point can restore the seal. But if the step flashing underneath is thin or brittle, the entire system is compromised. You cannot fix the bottom layer without removing the top. It is a binary choice: restore the mechanical seal or face structural failure.
Avoid the sealant trap. Many people use roofing cement to bridge gaps. This creates a false sense of security. Roofing cement is a temporary patch. It hides deeper structural rot while water continues to seep into your rafters. It is an emergency stopgap, not a permanent fix for fixing chimney flashing. Metal moves. Masonry stays still. Your repair must account for this reality.
The Problem with Roofing Cement and Caulk
Sealants fail because they lack the necessary flexibility. Metal and masonry expand and contract at different rates during temperature shifts. Rigid caulk eventually peels or cracks. It then acts as a dam, trapping water against the brick. This moisture accelerates mortar decay and wood rot in the roof deck. Roofing tar is a 24-hour emergency measure. It is not a professional solution. Using it long-term only guarantees a more expensive repair later.
Inspecting for Secondary Chimney Damage
Look beyond the metal. Water rarely stays in one place. Long-term leaks cause spalling, where moisture inside the brick freezes and expands, causing the brick face to pop off. Check your mortar joints. If they are soft or crumbling, the masonry is saturated. Examine the chimney crown for hairline fractures. These allow water to bypass your flashing entirely. If you suspect internal damage, a chimney inspection in New Jersey is vital. It identifies if your flue liner has begun to degrade from moisture exposure. A cracked crown or a failing liner can mimic a flashing leak, so a total system assessment is required.
A full replacement is necessary when the foundation of the system fails. If the step flashing is missing or improperly layered, your home is at risk. Precision is the only way to ensure a dry attic. If you find yourself constantly reapplying caulk, it is time for a permanent chimney repair to protect your investment.
How to Properly Fix Chimney Flashing: The Step-by-Step Process
Fixing chimney flashing requires a methodical approach and a disciplined eye. You cannot rush the preparation phase. Start by removing all old shingles and corroded metal around the chimney perimeter. Clear the site completely. You must see the bare roof deck to understand the extent of the damage. Understanding the sequence is the difference between a dry home and a recurring leak when fixing chimney flashing.
Inspect the wood for signs of rot. Soft, dark, or crumbling plywood indicates long-term saturation. Cut out these sections immediately. Replace them with new, structural-grade plywood. Once the deck is solid, install a high-temperature ice and water shield membrane. This self-adhering layer provides a critical secondary defense. It should wrap at least 6 inches up the masonry and 12 inches onto the roof deck. Now, you are ready for the precision metal work.
Installing Base and Step Flashing
The bottom-up layering begins with the base flashing. Bend the metal to fit the front face of the chimney. Ensure it extends at least 4 inches onto the roof and 4 inches up the brick. Overlaps must be at least 4 inches to prevent wind-driven rain from entering the joints. This is where many DIY attempts fail.
Next, install the step flashing along the sides. This is a repetitive, precise task. Interleave one piece of metal with each new course of shingles. The metal must be hidden by the shingle above it but sit on top of the shingle below it. This creates a staircase for water. Never nail the flashing to the chimney. Fasten it to the roof deck only. Buildings settle and shift. If you anchor the metal to both the roof and the masonry, it will buckle and tear the seal within a few seasons. Fixing chimney flashing correctly means allowing for this natural movement.
Cutting the Reglet and Installing Counter-Flashing
The final defense is the counter-flashing. This layer protects the top edges of your step flashing. To do this correctly, you must cut a "reglet" into the mortar joints. Use a circular saw or grinder equipped with a diamond blade. Cut a groove approximately 1 inch deep directly into the horizontal mortar line. Wear eye and lung protection. The dust is hazardous.
Clear all debris from the groove. Insert the top flange of your counter-flashing into this reglet. Secure the metal by driving lead wedges into the joint. These wedges provide a friction fit that allows for thermal expansion without loosening. Finally, seal the entire reglet joint with a high-grade polyurethane masonry sealant. Do not use standard silicone. Polyurethane maintains its bond during harsh NJ winters and humid summers. This completes the mechanical water-shedding system.
Critical Materials for New Jersey and Philadelphia Climates
The Mid-Atlantic climate is punishing. New Jersey and Philadelphia experience severe freeze-thaw cycles. Moisture enters the mortar during the day. It freezes and expands at night. This constant movement stresses the bond between your metal and the brick. Choose the wrong materials and your repair fails within five seasons. Material choice is the primary factor in long-term success when fixing chimney flashing. You need a system that survives the elements.
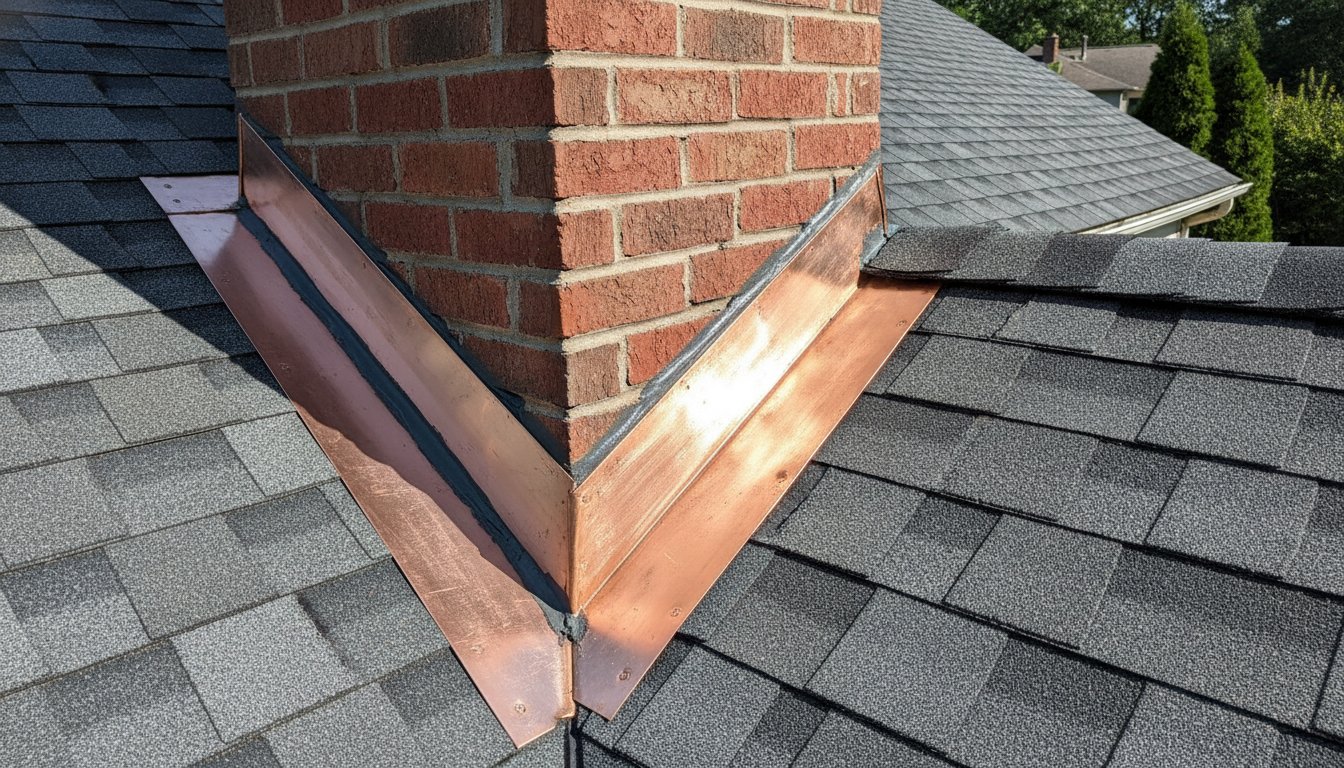
Galvanized steel is a common mistake. It is inexpensive but weak. It pits and rusts in our humid coastal air. These pinholes are invisible from the ground. They allow gallons of water to saturate your rafters. Copper is the professional choice for historic NJ neighborhoods. It is the gold standard. Copper develops a patina instead of corroding. It can protect a home for 50 years. An investment in safety and structural integrity.
Choosing the Right Metal for Your Roof
Aluminum is a viable, cost-effective alternative. It resists rust well. But you must ensure it is coated to prevent a chemical reaction with high-alkaline mortar. This reaction can eat through the metal in a single season. For modern homes, stainless steel is the most durable option. It withstands the corrosive exhaust of modern appliances. Consider the life expectancy of your roofing material. You want your flashing to outlast your shingles. Replacing flashing prematurely is a waste. Of both time and money.
The Importance of Proper Sealants
Your metal is only as good as the sealant holding it. Avoid standard silicone-based caulks. They are designed for bathrooms. Not brick. Silicone does not bond effectively to old, porous masonry. It will peel away within months. Professional-grade polyurethane or tri-polymer sealants are the industry standard. These materials remain flexible during sub-zero temperatures. They maintain their grip through scorching summer heat.
This durability is why a gas fireplace service in NJ always includes a thorough check of these seals. If the sealant has cracked, the mechanical system is compromised. Precision matters. Fixing chimney flashing requires more than just metal. It requires the right chemical bond. If you aren't sure about the state of your materials, schedule a professional chimney repair to ensure your home remains watertight.
Why Professional Flashing Repair is a Safety Investment
Fixing chimney flashing is a high-stakes operation. It requires more than a steady hand and a ladder. It demands fall-arrest systems and specialized training. Roofs are steep. Chimneys are often in difficult-to-reach locations. One slip is a catastrophe. Professional technicians manage these risks daily. We possess the safety gear to perform the job without endangering ourselves or your property. Beyond physical safety, there is the safety of the structure itself. A professional repair is a shield for your largest investment.
Improper work creates "hidden leaks." These are the silent killers of a home. Water bypasses the flashing and enters the structural rafters. You won't see a stain on your ceiling for months. By then, the wood is soft. Rot has set in. The repair cost has tripled because the roof deck now needs replacement. Certified technicians understand the intersection of roofing and chimney venting physics. We ensure that your repair doesn't just block water. It must also maintain the correct thermal dynamics of the chimney. Absolute Chimney Pros provides CSIA-certified expertise for every structural repair. We ensure the mechanical seal and the exhaust path are both perfect. There is no guesswork involved in our process.
The Risks of DIY Flashing Attempts
DIY mistakes are expensive. Poorly installed flashing can void your roof warranty. Insurance companies often deny water damage claims if the work wasn't performed by a professional. There are also life-safety issues to consider. Incorrectly sealed chimneys can lead to masonry failure. If the brickwork shifts or the mortar fails, it can block the flue. This creates immediate carbon monoxide risks for your family. Reviewing chimney fire prevention tips is a good start for any homeowner. But structural repairs require a professional hand to ensure total safety. Don't gamble with your home's ventilation.
How Absolute Chimney Pros Secures Your Home
We prioritize your peace of mind through technical mastery and punctuality. Our team offers same-week appointments for urgent leak inspections in NJ and PA. We don't guess. Our technicians use camera-assisted technology to inspect the interior flue and the exterior structure simultaneously. This ensures no internal damage exists that could compromise your safety. We act as your protective partner, identifying hazards before they become disasters. Contact us today for an on-site estimate with no hidden fees. We deliver transparency, exactness, and the reliability you deserve. Let us secure your home against the elements today.
Secure Your Home Against Structural Water Damage
Your chimney is the most vulnerable point on your roof. You now understand that fixing chimney flashing is a matter of mechanical layering and material precision. A simple tube of caulk cannot replace a properly integrated step and counter-flashing system. Choosing durable metals like copper ensures your home survives the harsh freeze-thaw cycles of the Mid-Atlantic. Ignoring a minor stain today leads to structural wood rot tomorrow. Precision is the only path to a dry attic.
Don't wait for the next storm to test your roof's integrity. Our CSIA-Certified Technicians are ready to provide a definitive solution. We offer same-week appointments and are fully licensed and insured in NJ and PA. We eliminate the guesswork and provide transparent, professional results. Schedule Your Professional Chimney Inspection in NJ or PA Today.
Protecting your family starts with a watertight seal. We are here to ensure your chimney remains a safe and functional asset for your home. Let's secure your roof together.
Frequently Asked Questions
How much does it cost to fix chimney flashing in New Jersey?
Total costs depend on the chimney's size, the roof's pitch, and the metal you choose. A small, single-flue chimney requires fewer materials than a large, multi-flue structure. Labor rates in the Mid-Atlantic reflect the specialized masonry and roofing skills required for a watertight seal. Request a professional on-site estimate to get an accurate figure for your specific home.
Can I just use roofing caulk to stop a chimney leak?
Roofing caulk is a temporary emergency measure, not a permanent fix. It lacks the flexibility to survive the constant thermal expansion between metal and masonry. Water eventually gets trapped behind the sealant, which accelerates wood rot and masonry decay. For a lasting solution, you must restore the mechanical water-shedding system through professional repair techniques.
How long does chimney flashing typically last?
Lifespan depends entirely on the material used and the local weather conditions. Galvanized steel often fails within 15 to 20 years due to corrosion in our humid climate. Aluminum lasts slightly longer but can react with certain mortars. Copper is the gold standard, often protecting a home for 50 years or more. Regular inspections ensure you catch minor failures early.
What is the difference between step flashing and counter-flashing?
Step flashing consists of L-shaped metal pieces woven into each shingle course along the chimney's side. It protects the roof-to-wall junction. Counter-flashing is the top layer. It is embedded directly into the masonry mortar joints and hangs over the step flashing. Together, they create a watertight staircase that sheds rain away from your home's interior structure.
Does a roof leak near the chimney mean I need a new roof?
Not necessarily. A leak in this area is frequently a localized failure of the flashing system or the chimney crown. If the rest of your shingles are in good condition, fixing chimney flashing can resolve the issue without the expense of a full roof replacement. A professional inspection determines if the leak is isolated or a sign of broader roof aging.
What happens if I ignore a small chimney flashing leak?
Small leaks quickly turn into expensive structural disasters. Water seeps into the roof deck and rafters, causing wood rot that remains invisible from your living space. This moisture also promotes mold growth and can damage the interior masonry of your chimney. Early intervention is the only way to prevent a minor repair from becoming a total structural overhaul.
Is chimney flashing repair covered by homeowners insurance?
Insurance coverage typically depends on the root cause of the damage. If a sudden storm or a fallen tree damaged the metal, your policy might cover the repair. Most insurers exclude damage caused by long-term wear, rust, or a lack of maintenance. Review your specific policy and document all damage immediately after a major weather event.
Should a roofer or a chimney sweep fix my flashing?
A CSIA-certified chimney professional is the best choice for this specific task. While roofers understand shingles, chimney sweeps specialize in the intersection of masonry, venting physics, and metalwork. We ensure the flashing integrates perfectly with the mortar joints without compromising the structural integrity of the brickwork or the safety of your flue system.